


How to configure your AirPods Pro 2? ZDNET, modify the settings of the AirPods Pro (all generations) – Apple Assistance (FR)
![]()
Change airpods pro settings (all generations)
Image: Adrian Kingsley-Hughes
How to configure your AirPods Pro 2 ?
Practical: here is how to quickly put yourself to use your new pro AirPods.
By Adrian Kingsley-Hughes | Tuesday 04 October 2022

Airpods have just received a highly anticipated fresh. And although the new AirPods Pro 2 are very similar to the original version, there are a lot of improvements which are both visible and invisible to the naked eye.
If you have just acquired pro 2 airpods, here is how to make them functional to wedge them in your ears as quickly as possible.
How to configure your AirPods Pro 2 ?
1. Remove existing AirPods or Airpods from your Bluetooth devices
If you have AirPods or Pro Airpods and you plan to get rid of them, it’s time to delete them from your Bluetooth devices.
Go to Settings> Bluetooth, Then search for your AirPods or AirPods Pro. Click on the blue i next to the name, then on Forget.
Once this step has passed, you can start the configuration.
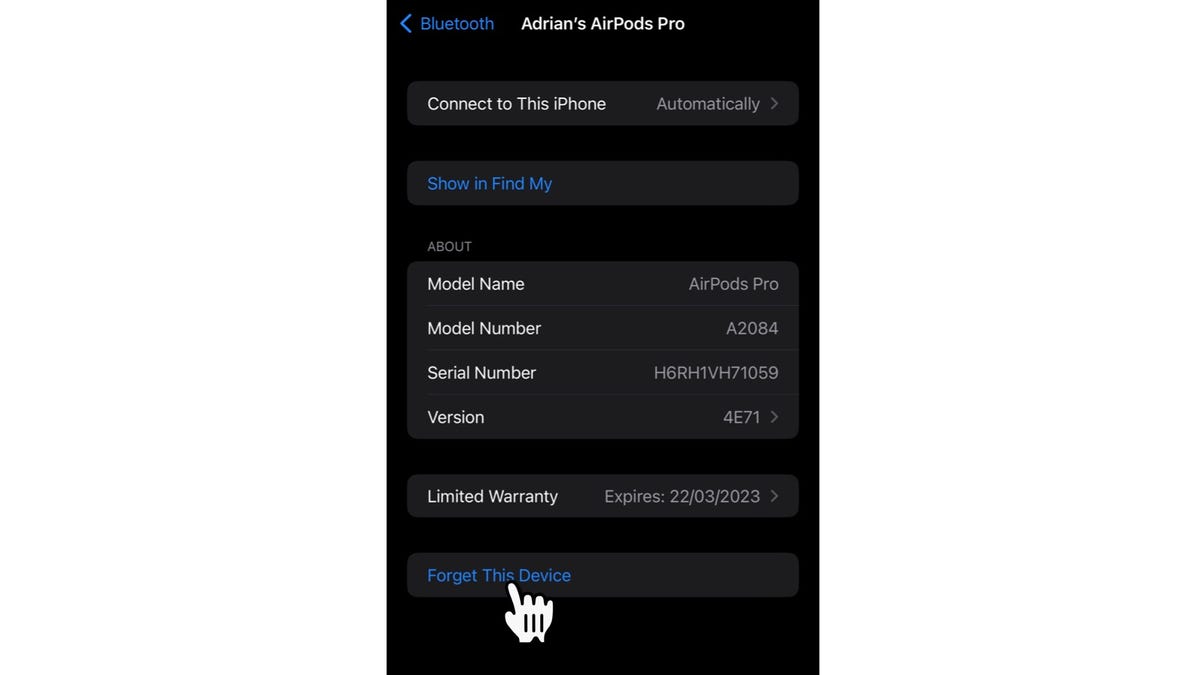
Image: Adrian Kingsley-Hughes
2. Free yourself from space (and time)
First, develop a little space (because if you have to change the tips, you don’t want them to get lost in the middle of your office chaos).
The good news is that the installation in itself does not take long.

Image: Adrian Kingsley-Hughes
3. Unpack the pro airpods
Then comes the unpacking. that Apple made very easy !
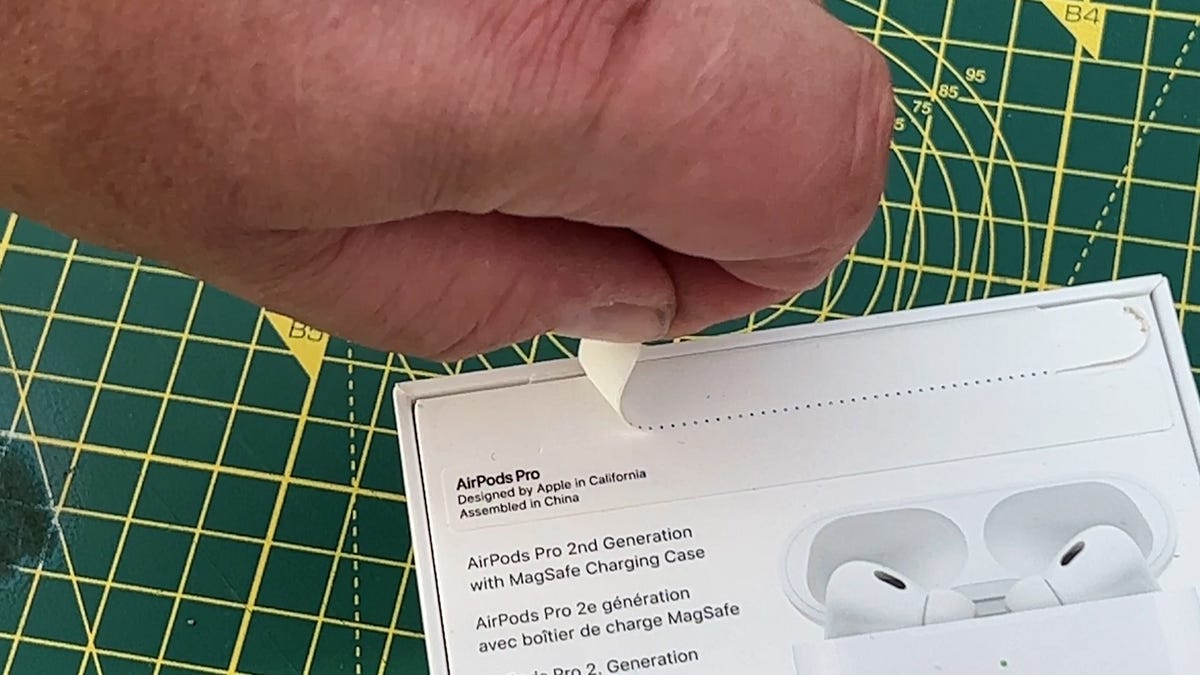
Image: Adrian Kingsley-Hughes.
4. A charge
First recharge your AirPods Pro (five or ten minutes are enough) and then get them out of their housing.
5. Comfort above all
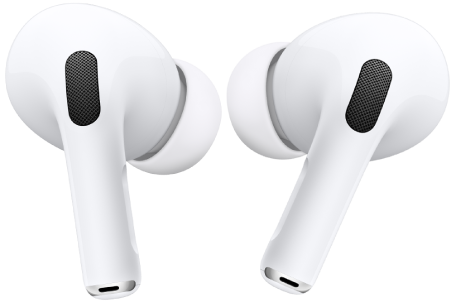
Apple provides a whole range of tips, and it is good to find those that suit you best (you can then test the adjustment).
To replace the tips, you have to remove the old ones by shooting it, then set up the new ones (make sure they are well wedged and well in place).

Image: Adrian Kingsley-Hughes.
6. Pairing with your iPhone
It’s now time to pair them at your iPhone. Approach the phone and open the case. It’s as simple as that.
7. Tip adjustment
Once the airpods pro paid, let’s test the tip adjustment. To do this, go to Settings> Bluetooth, Then find your AirPods Pro. Press the blue key I Next to the name of your AirPods Pro, then on Tip adjustment.
And here you are, you are finished !
Apple’s latest smartwatch is intended for runners, explorers and even divers. How does she defend herself.
Follow all Zdnet’s news on Google News.
By Adrian Kingsley-Hughes | Tuesday 04 October 2022
Change airpods pro settings (all generations)
On the iPhone, iPad or Mac, you can modify commands of the AirPods Pro. For example, you can customize the action carried out when you keep the AirPods PRO sensor (1st generation) or the airpods tactile command (2nd generation), modify the location of the microphone detection of automatic ears detection of the ears detection , and more.
Modify the action associated with the sensor-pressure or the touch control
You can modify the action made when you hold your finger pressed on the stem of your AirPods Pro.
- Wear your airpods and check that they are connected to your device.
- Perform one of the following operations:
- On the iPhone or iPad: Access adjustments
 , then touch the name of your airpods at the top of the screen.
 - On the Mac: Choose the Apple menu

Change the method to use to put an end to a call and cut the sound with the AirPods Pro
By default, you can press the rod of your airpods twice to end a call and press once to cut and reactivate the sound, but you can reverse these commands.
- Wear your airpods and check that they are connected to your device.
- Perform one of the following operations:
- On the iPhone or iPad: Access adjustments , then touch the name of your airpods at the top of the screen. Touch hang up or “cut and reactivate the sound”, then choose “press once” or “press twice”. The other option is automatically changed.
- On the Mac: Choose the Apple menu
Define the location of the microphone on airpods
- Wear your airpods and check that they are connected to your device.
- Perform one of the following operations:
- On the iPhone or iPad: Access adjustments , then touch the name of your airpods at the top of the screen.
- On the Mac: Choose the Apple menu
- Airpods auto change: One of your airpods acts as a microphone. If you use only one, it acts as a microphone.
- Always on the left or always right: The airpod you choose becomes the microphone, even if you remove it from your ear or place it in the case.
Disable automatic ears detection
Your airpods pro automatically stop playing audio content when you remove them, and take it back when you put them back. You can change this setting.
- Wear your airpods and check that they are connected to your device.
- Perform one of the following operations:
- On the iPhone or iPad: Access adjustments , Tap the name of your airpods at the top of the screen, then activate or deactivate “Automatic Ear Detection”.
- On the Mac: Choose the Apple menu
Disable sounds of the AirPods Pro load box (2nd generation)
The load box of the AirPods Pro (2nd generation) emits sounds during twinning, recharge, etc. You can deactivate these sounds.
- Wear your airpods and check that they are connected to your device.
- Perform one of the following operations:
- On the iPhone or iPad: Access adjustments , Tap the names of your airpods at the top of the screen, then activate or deactivate “Activate sounds on the load box”.
- On the Mac: Choose the Apple menu
You can also change the volume of sound effects emitted by your AirPods. Consult the Regulate the volume of the sound effects of the AirPods.
This guide was written for iOS 17, iPados 17, Watchos 10, Tvos 17, MacOS Sonoma or subsequent versions.