


Solving Wi -Fi connection problems in Windows – Microsoft support, solving Internet connection problems on Mac – Apple Assistance (FR)
![]()
Solve internet connection problems on Mac
To add the Mac address to your router’s access list:
Solve Wi-Fi connection problems in Windows
If you cannot receive email, browse the web or broadcast music, there is a good chance that you are not connected to your network and that you cannot access the Internet. To solve the problem, here are some solutions that you can try.
Solutions to try first
First of all, proceed as follows to try to resolve or circumscribe the connection problem.
- Make sure Wi-fi is activated. Select the “Internet connection” icon on the right side of the taskbar and make sure Wi-Fi is activated. If not, select it to activate it. Also check that Airplane mode is disabled.
- Select Manage Wi-Fi connections (>) in the parameter Fast Wi-Fi . Check if a Wi-Fi network that you recognize and approve appears in the list of networks. If this is the case, select the Wi-Fi network and they try to connect. If he indicates Connected Under the name of the network, select Disconnect, wait for a moment, then select once again connect.
- Try to connect to a network on another frequency band. Many Wi-Fi Roads in the consumer public broadcast on two different network frequency bands: 2.4 GHz and 5 GHz. These appear as distinct networks in the list of available Wi-Fi networks. If your Wi-Fi networks list has both a 2.4 GHz network and a 5 GHz network, try to connect to the other network. To find out more about the differences between 2.4 GHz networks and 5 GHz networks, Wi-Fi Problems Activated Case and your reception arrangement.
- Make sure the physical wi-fi switch on your laptop is activated. (Its activation is generally indicated by a light indicator.))
- Run the network problem solving utility. The network problem solving utility makes it possible to diagnose and solve current connection problems.
To execute the network problem solving utility
- Select To start up >Settings >System >Solve problems >Other problem -solving utilities .
- Below The most common, select Network & Internet >Execute, or select the button below to start the network & Internet functionality get help.
- Restart your modem and your wireless router. This allows you to create a new connection to your Internet access provider (ISP).
Noticed : If you have a combined device-to-the-day/Wi-Fi route, you should only follow the single device steps.
- Disconnect the supply cable from the power source router.
- Disconnect the supply cable from the power source modem.
Limit the source of the problem
Connection problems can be due to various reasons: website problems, device, Wi-Fi router, modem or internet service provider (ISP). Try the following steps to refine the source of the problem.
- If the “Wi-Fi connection” icon is displayed on the right side of the taskbar, visit another website. If the website opens, there may be a problem with the specific website. If you cannot connect to another website, go to the next step.
- On another laptop or phone, try to connect to the same network. If you can connect, the source of the problem is probably due to your device. Access the network problem solving section on your device. If you cannot connect to the network on a device, go to the next step.
- Check if there is a problem with connection to your Wi-Fi router. To do this, use a ping test.
- Select To research in the taskbar, then type Command Prompt. The button Command Prompt appears. To the right of it, select Execute as administrator >Yes.
- At the command prompt, type ipconfig, Then select Entrance. Look for the name of your Wi-Fi network in the results, then search for the IP address listed with regard to Default Gateway For this Wi-Fi network. Note this address if necessary. For example: 192.168.1.1
- At the invite, type ping, then select Entrance. For example, type Ping 192.168.1.1, Then select Entrance. The results must look like this:
- Response from 192.168.1.1: bytes = 32 Duration = 5 ms TTL = 64
- Response from 192.168.1.1: bytes = 32 Duration = 5 ms TTL = 64
- Response from 192.168.1.1: bytes = 32 Duration = 5 ms TTL = 64
- Response from 192.168.1.1: bytes = 32 Duration = 5 ms TTL = 64
- Ping statistics for 192.168.1.1: Packages: sent = 4, received = 4, lost = 0 (loss of 0 %), approximate round trip in millions second: minimum = 4 ms, maximum = 5 ms, medium = 4 ms
If you see results like this and you get an answer, you have a connection to your Wi-Fi router. There may therefore be a problem with your MoDem or your Internet Service Provider. Contact your Internet service provider or box activated online on another device (if you can) to see if there is a service failure.
If the Ping test results indicate that you do not get a response from the router, try to connect your PC directly to your modem using an ethernet cable (if possible). If you can connect to the Internet using an Ethernet cable, this confirms that the connection problem is due to the Wi-Fi router. Check that you have installed the most recent firmware and consult the documentation of your router.
Resolution of network problems on your device
Execute network orders
Try to run these network orders to manually reset the TCP/IP battery, free and renew the IP address, and empty and reset the DNS customer resolver cache:
- Select To research in the taskbar, then type Command Prompt. The button Command Prompt appears. To the right of it, select Execute as administrator >Yes.
- In the command prompt, run the following commands in the order they appear, then check if it solves the connection problem:
- Tap Netsh Winsock Reset and select Entrance.
- Tap Netsh int ip reset and select Entrance.
- Tap IPCONFIG /Release and select Entrance.
- Tap IPCONFIG /RENEW and select Entrance.
- Tap IPCONFIG /FLUSHDNS and select Entrance.
Uninstall the network card driver and restart
If the previous steps did not work, try to uninstall the driver of the network card, then restart your computer. Windows will automatically install the most recent driver. This approach is recommended if the network connection problem appears after a recent update.
Before any uninstall, make sure you have pilot backup copies. Access the manufacturer’s manufacturer’s website and download the latest driver available for your network card. If your PC cannot connect to the Internet, you will need to download a pilot to another PC and save it on a USB key to be able to install it on your PC. You will need the name of the manufacturer of the PC, as well as the name or number of the model.
- Select To research In the taskbar, type device Manager, Then Select Device Manager in the results list.
- Develop Network cards And search for your device’s network card.
- Select the network card, press a long time (or right -click), then select Uninstall the device > Enabled box the area Attempt to remove the pilot for this device Activated box>Uninstall.
- After uninstalled the pilot, select To start up >Power >To restart .
Once your PC has restarted, Windows is looking for and automatically installs the network card driver. Check if it solves the connection problem. If Windows does not automatically install the driver, try to install the saved backup driver before uninstall.
Check if your network card is compatible with the latest Windows Update
If you have lost your network connection immediately after upgrading to or the Windows 11 update, it is possible that the current driver of your network card was designed for a previous version of Windows. For activated box, try to temporarily uninstall the recent windows update:
- Select To start up >Settings >Windows Update >Historical Updates>Uninstall updates .
- Select the most recent update, then Select uninstall.
If the uninstalling the most recent update restores your network connection, an activated box to see if a updated driver is available:
- Select To research In the taskbar, type device Manager, Then Select Device Manager in the results list.
- Develop Network cards And search for your device’s network card.
- Select the network card, press a long time (or right -click), select Update the pilot >Automatically search for the updated driver software, Then follow the instructions.
- After installing the updated driver, select To start up >Power >To restart If you are invited to restart and check if it solves the connection problem.
If Windows does not find a new driver for your network card, go to the manufacturer’s manufacturer’s website to download the latest network card driver available. You will need the name of the manufacturer of the PC, as well as the name or number of the model.
Perform one of the following actions:
- If you have not been able to download and install a more recent network card driver, mask the update that makes you lose your network connection. To find out how to hide the updates, consult hide updates of Windows updates or pilots.
- If you have managed to install the updated drivers for your network card, reinstall the latest updates. To do this, select To start up THE settings >>Windows Update >Search updates.
Use network reset
Network reset is to be used as a last resort. Only carry out this operation if the previous steps have not resolved the connection problem.
This can help solve the connection problems you may encounter after Windows 10 upgrade to Windows 11. It can also help solve the problem where you can connect to the Internet, but not to shared network readers. Network reset removes all the network adapters you have installed and their settings. Once your PC has restarted, all network cards are reinstalled and the default values of the associated parameters are restored.
- Select To start up >Settings >Network & Internet >Advanced network settings >Network reset.
Open the parameters of the network & Internet - On the screen Network reset, select Reset now >Yes to confirm.
Wait until your PC restarts and check if it solves the problem.
- After using network reset, you may need to reinstall and reconfigure other network software you use, such as VPN customer software or hyper-V virtual switches (or any other network virtualization software you use).
- Network reset can define each of your network connections known on a public network profile. On a public network profile, your PC is not detectable by other PCs and network devices, which can help strengthen its safety. However, if your PC is used for sharing files or printers, you will have to make it detectable again by configuring it to use a private network profile. To do this, select To start up >Settings >Network & Internet >Wireless . On the screen Wireless, select Manage known networks > The network connection you want to modify. Below Network profile type, select Private.
Additional problem solving steps
Check your Wi-Fi settings
Wi-Fi card manufacturers can offer different advanced settings that you can adapt to your network environment or your connection preferences.
Check the wireless fashion setting of your network card and make sure it corresponds to the network’s capacities to which you are trying to connect. If it does not correspond, you will not be able to connect, and it is possible that the network does not even appear in the list of available networks. Very often, the wireless mode defaults the auto value or a similar value, which allows the connection for each type of network supported.
To find the wireless fashion setting
- In the peripheral manager, select Network cards, Then double-click on the name of the network card.
- Select the tab Advance And look for a parameter Wireless fashion. Make sure it is defined in the mode used by your network.
Wi-Fi Profile settings
Windows uses the Wi-Fi profile in order to save the necessary settings to connect to a Wi-Fi network. These parameters include the type of network security, the key, the name of the network (SSID), etc. If you cannot connect to a Wi-Fi network to which you could connect before, it is possible that the network settings have changed or the profile is damaged.
To solve this problem, delete or forget the network connection, then reconnect to the network. When you forget a network connection, the Wi-Fi network profile is deleted from your PC.
To forget a network
- Select To start up >Settings >Network & Internet .
- Below Wireless , select Manage known networks.
- Select the network you want to forget, then Forget.
Then select the icon Wireless in the taskbar and try to reconnect to the network to renew the network connection.
Check the layout of your home page
Your Wi-Fi network can be affected by network frequency band, congestion of channels and/or signal power. For more information, see problems related to Wi-Fi and your home.
Look for additional symptoms for the “no internet connection” icon.
There may be steps for solving additional problems you can try, depending on the symptoms you encounter. To display these steps, activated box Wi-fi connection icons and their meaning.
Related sections
- Configuration of a wireless network
- How to find the password of your wireless network
- Analyze the wireless network report
- Wi-Fi tools and applications
- Make a Wi-Fi network public or private in Windows
Solutions to try first
First of all, proceed as follows to try to resolve or circumscribe the connection problem.
- Make sure Wi-fi is activated. Select the “no internet connection” icon
 On the right side of the taskbar, then make sure Wi-Fi is activated. If not, select it to activate it. Also check that Airplane mode is disabled.
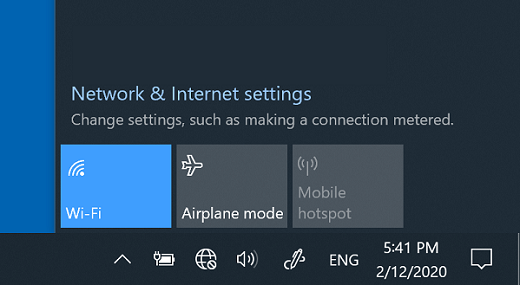
- Then check if a Wi-Fi network that you recognize and approve appears in the list of networks. If this is the case, select the Wi-Fi network and they try to connect. If he indicates Connected Under the name of the network, select Disconnect, wait for a moment, then select once again connect .
- Try to connect to a network on another frequency band. Many Wi-Fi Roads in the consumer public broadcast on two different network frequency bands: 2.4 GHz and 5 GHz. These appear as distinct networks in the list of available Wi-Fi networks. If your Wi-Fi networks list has both a 2.4 GHz network and a 5 GHz network, try to connect to the other network. To find out more about the differences between 2.4 GHz networks and 5 GHz networks, Wi-Fi Problems Activated Case and your reception arrangement.
- Make sure the physical wi-fi switch on your laptop is activated. (Its activation is generally indicated by a light indicator.))
- Run the network problem solving utility. The network problem solving utility makes it possible to diagnose and solve current connection problems.
To execute the network problem solving utility
- Select the button To start up >Settings >Network & State> Internet .
Open the parameters of the network & Internet - Below Modify your network settings, select Network problem solving.
- Follow the steps described in the problem solving utility and check if it solves the problem.
Limit the source of the problem
Connection problems can be due to various reasons: website problems, device, Wi-Fi router, modem or internet service provider (ISP). Try the following steps to refine the source of the problem.
- If the “Wi-Fi connection” icon is displayed on the right side of the taskbar, visit another website. If the website opens, there may be a problem with the specific website. If you cannot connect to another website, go to the next step.
- On another laptop or phone, try to connect to the same network. If you can connect, the source of the problem is probably due to your device. Access the network problem solving section on your device. If you cannot connect to the network on a device, go to the next step.
- Check if there is a problem with connection to your Wi-Fi router. To do this, use a ping test.
- In the search bar of the taskbar, type Command Prompt. The button Command Prompt appears. Right, select Execute as administrator >Yes.
- At the command prompt, type ipconfig, Then select Entrance. Look for the name of your Wi-Fi network in the results, then search for the IP address listed with regard to Default Gateway For this Wi-Fi network. Note this address if necessary. For example: 192.168.1.1
- At the invite, type ping, then select Entrance. For example, type Ping 192.168.1.1 , Then select Entrance. The results must look like this:
- Response from 192.168.1.1: bytes = 32 Duration = 5 ms TTL = 64
- Response from 192.168.1.1: bytes = 32 Duration = 5 ms TTL = 64
- Response from 192.168.1.1: bytes = 32 Duration = 5 ms TTL = 64
- Response from 192.168.1.1: bytes = 32 Duration = 5 ms TTL = 64
- Ping statistics for 192.168.1.1: Packages: sent = 4, received = 4, lost = 0 (loss of 0 %), approximate round trip in millions second: minimum = 4 ms, maximum = 5 ms, medium = 4 ms
If you see results like this and you get an answer, you have a connection to your Wi-Fi router. There may therefore be a problem with your MoDem or your Internet Service Provider. Contact your Internet service provider or box activated online on another device (if you can) to see if there is a service failure.
If the Ping test results indicate that you do not get a response from the router, try to connect your PC directly to your modem using an ethernet cable (if possible). If you can connect to the Internet using an Ethernet cable, this confirms that the connection problem is due to the Wi-Fi router. Check that you have installed the most recent firmware and consult the documentation of your router.
Resolution of network problems on your device
Execute network orders
Try to run these network orders to manually reset the TCP/IP battery, free and renew the IP address, and empty and reset the DNS customer resolver cache:
- In the search bar of the taskbar, type Command Prompt. The button Command Prompt appears. To the right of it, select Execute as administrator >Yes.
- In the command prompt, run the following commands in the order they appear, then check if it solves the connection problem:
- Tap Netsh Winsock Reset and selectEntrance.
- Tap Netsh int ip reset and select Entrance.
- Tap IPCONFIG /Release and select Entrance.
- Tap IPCONFIG /RENEW and select Entrance.
- Tap IPCONFIG /FLUSHDNS and select Entrance.
Uninstall the network card driver and restart
If the previous steps did not work, try to uninstall the driver of the network card, then restart your computer. Windows will automatically install the most recent driver. This approach is recommended if the network connection problem appears after a recent update.
Before any uninstall, make sure you have pilot backup copies. Access the manufacturer’s manufacturer’s website and download the latest driver available for your network card. If your PC cannot connect to the Internet, you will need to download a pilot to another PC and save it on a USB key to be able to install it on your PC. You will need the name of the manufacturer of the PC, as well as the name or number of the model.
- In the search bar of the taskbar, type device Manager, Then select device Manager in the results list.
- Develop Network cards And search for your device’s network card.
- Select the network card, press a long time (or right -click), then select Uninstall the device > Enabled box the area Attempt to remove the pilot software for this device Activated box>Uninstall.
- After uninstalled the pilot, select the button To start up >Power >To restart. Once your PC has restarted, Windows is looking for and automatically installs the network card driver. Check if it solves the connection problem. If Windows does not automatically install the driver, try to install the saved backup driver before uninstall.
Check if your network card is compatible with the latest Windows Update
If you have lost your network connection immediately after upgrading or update Windows 10, it is possible that the current driver of your network card has been designed for a previous version of Windows. For activated box, try to temporarily uninstall the recent windows update:
- Select the button To start up , Then select Settings >Update & security >Windows Update >Show the update history >Uninstall updates.
- Select the most recent update, then Select uninstall.
If the uninstalling the most recent update restores your network connection, an activated box to see if a updated driver is available:
- In the search bar of the taskbar, type device Manager, Then select device Manager in the results list.
- Develop Network cards And search for your device’s network card.
- Select the network card, select Update the pilot >Automatically search for the updated driver software, Then follow the instructions.
- After installing the updated driver, select the button To start up >Power >To restart If you are invited to restart and check if it solves the connection problem.
If Windows does not find a new driver for your network card, go to the manufacturer’s manufacturer’s website to download the latest network card driver available. You will need the name of the manufacturer of the PC, as well as the name or number of the model.
Perform one of the following actions:
- If you have not been able to download and install a more recent network card driver, mask the update that makes you lose your network connection. To find out how to hide the updates, consult hide updates of Windows updates or pilots.
- If you have managed to install the updated drivers for your network card, reinstall the latest updates. To do this, select the button To start up , Then select Settings >Update & security >Windows Update >Search updates.
Use network reset
Network reset is to be used as a last resort. Only carry out this operation if the previous steps have not resolved the connection problem.
This can help you solve the connection problems you may have after upgrading a previous Windows version to Windows 10. It can also help solve the problem where you can connect to the Internet, but not to shared network readers. Network reset removes all the network adapters you have installed and their settings. Once your PC has restarted, all network cards are reinstalled and the default values of the associated parameters are restored.
Noticed : To use network reset, your PC must run Windows 10 version 1607 or subsequent. To see which version of Windows 10 your device is running, select the button To start up , Then select Settings > System > About of.
- Select the button To start up , Then select Settings >Network & Internet >State >Network reset.
Open the parameters of the network & Internet - On the screen Network reset , select Reset now >Yes to confirm. Wait until your PC restarts and check if it solves the problem.
- After using network reset, you may need to reinstall and reconfigure other network software you use, such as VPN customer software or hyper-V virtual switches (or any other network virtualization software you use).
- Network reset can define each of your network connections known on a public network profile. On a public network profile, your PC is not detectable by other PCs and network devices, which can help strengthen its safety. However, if your PC is used for sharing files or printers, you will have to make it detectable again by configuring it to use a private network profile. To do this, select the button To start up , Then select Settings >Network & Internet >Wireless . On the screen Wireless , select Manage known networks > The network connection you want to modify>Properties. Below Network profile, select Private.
Additional problem solving steps
Check your Wi-Fi settings
Wi-Fi card manufacturers can offer different advanced settings that you can adapt to your network environment or your connection preferences.
Check the wireless fashion setting of your network card and make sure it corresponds to the network’s capacities to which you are trying to connect. If it does not correspond, you will not be able to connect, and it is possible that the network does not even appear in the list of available networks. Very often, the wireless mode defaults the auto value or a similar value, which allows the connection for each type of network supported.
To find the wireless fashion setting
- In the peripheral manager, select Network cards, Then double-click on the name of the network card.
- Select the tab Advance And look for a parameter Wireless fashion . Make sure it is defined in the mode used by your network.
Wi-Fi Profile settings
Windows uses the Wi-Fi profile in order to save the necessary settings to connect to a Wi-Fi network. These parameters include the type of network security, the key, the name of the network (SSID), etc. If you cannot connect to a Wi-Fi network to which you could connect before, it is possible that the network settings have changed or the profile is damaged.
To solve this problem, delete or forget the network connection, then reconnect to the network. When you forget a network connection, the Wi-Fi network profile is deleted from your PC.
To forget a network
- Select the network icon Wireless on the right side of the taskbar, then select Network & Internet settings.
- Select Wireless , Then Manage known networks.
- Select the network you want to forget, then Forget.
Then select the Wi-Fi icon in the taskbar and try to reconnect to the desired network to renew the network connection.
Check the layout of your home page
Your Wi-Fi network can be affected by network frequency band, congestion of channels and/or signal power. For more information, see problems related to Wi-Fi and your home.
Look for additional symptoms for the “no internet connection” icon
There may be steps for solving additional problems you can try, depending on the symptoms you encounter. To display these steps, activated box Wi-fi connection icons and their meaning.
Related sections
- Implementation of a wireless network
- Search the password of the wireless network
- Analyze the wireless network report
- Wi-Fi tools and applications
- Make a Wi-Fi network public or private in Windows 10
Check the basic operation of your PC
- Make sure Wi-Fi is activated.
- Perform a scanning movement from the right edge of the screen, select Settings, Then select the icon Network.
- Activate the Wireless.
- Make sure the physical wi-fi switch on your laptop is activated. (Its activation is generally indicated by a light indicator.))
- Make sure your PC is not in plane mode.
- Perform a scanning movement from the right edge of the screen, select Settings, Then select the icon Network.
- Disable it airplane mode.
- If possible, bring your PC closer to the router or the access point.
- If you do not see the name of the network at all, the router or the access point may not be configured to disseminate the network name. You will have to connect there manually.
- Scan from the right edge of the screen, then select Settings.
- Select the icon Network, Then select Masked network.
- Enter the network name, then select Following.
- Enter the password, then select Following.
- Follow the additional instructions displayed on the screen to connect.
- The network is added to your network list and can be used when your PC is within reach. To connect to the network, proceed as follows:
- Open Connection to a network By selecting the network icon in the notification area.
- Select Name -free network, Then To log in. Then enter the network information. The network is added to your network list and can be used later when your PC is within reach.
Use the network problem solving utility
Let Windows try to help you solve the problem. Run the network problem solving utility to see if it can help diagnose and solve your problem.
Select the button To start up , Start type network problems, Then select Identify and repair problems on the network in the list.
Execute network orders after using the network problem solving utility
The network problem solving utility (mentioned above) makes it possible to diagnose and solve certain current connection problems. After using it, try to run the network orders below, as the combination of these two operations may restore connection.
If your problem is not resolved after executing the network problem solving utility, try to:
- Reset the TCP/IP battery;
- Release the IP address;
- Repeat the IP address.
- Empty and reset the DNS customer resolution cache.
Here is how to execute these network orders in a command prompt window:
- Select the button To start up , Start type cmd, right -click on Command Prompt In the list, select Execute as administrator, Then select Yes.
- At the command prompt, run the following commands in the order indicated, then box activated to see if this solves your connection problem:
- Grab Netsh Winsock Reset And press Enter.
- Grab Netsh int ip reset And press Enter.
- Grab IPCONFIG /Release And press Enter.
- Grab IPCONFIG /RENEW And press Enter.
- Tap IPCONFIG /FLUSHDNS And press Enter.
Restart your modem and router.
This allows you to create a new connection to your Internet access provider (ISP). When you perform this operation, all people connected to your Wi-Fi network are temporarily disconnected.
The steps to follow to restart your modem and your router may vary. Here is the general follow -up:
- Disconnect the supply cable from the power source router.
- Disconnect the supply cable from the power source modem.
Check if the problem comes from the Modem or your Internet service provider
Make sure the problem does not come from your cable modem or your internet service provider. If necessary, contact your Internet service provider.
- Select the button To start up , Start type cmd, right -click on Command Prompt In the list, select Execute as administrator, Then select Yes.
- At the command prompt, type ipconfig.
The result must look like this:
If the ping request is successful and results similar to those described above are displayed, but you still cannot connect to the Internet from your PC, the problem may come from your modem or your service provider Internet.
Check your network card
If you always encounter connection to a network, it can be linked to your network card.
- Try to use the network problem problem solving utility to automatically detect and solve certain problems. This deactivated troubleshooting utility then reactivates the card and tries to carry out certain other current repair operations.
- Select the button To start up , Start type device Manager, Then select it in the list.
- In the peripheral manager, select Network cards, right -click on your card, then select Properties.
- Click on the tab Pilot, Then select Update the pilot.
- Select Automatically search for an updated software driver.
If Windows does not find a new driver for your network card, go to the manufacturer’s manufacturer’s website to download the latest network card driver available. If your PC cannot connect to the Internet, you will have to download a driver on another PC, then save this driver on a USB memory disk to be able to install it on your PC. You will need the name of the manufacturer of the PC, as well as the name or number of the model.
Other steps to try with your router
Here are some items to check and try with your router if you are at home and have connection difficulties.
- If you do not see the name of the network, log into your router and check that it is configured to broadcast the name of the network.
- Connect your PC to your router using an Ethernet cable.
- Open your web browser and enter the IP address of your wireless router. (For example, 192.168.1.1 or 172.16.0.0; To find the default IP address, see the documentation for your router.))
- Connect with your username and password, then check that an option entitled Activate the distribution of SSID, Wireless SSID broadcast or similar is activated. This parameter generally appears on a wireless parameter page.
- Check that your Wi-Fi network uses media access control (Mac) addresses for safety reasons. If this is the case, you must add the Mac address of your PC to the access list of your router before you can connect.
- Select the button To start up . Start type cmd and right -click on Command Prompt in the list. Select Execute as administrator, Then Yes.
- At the command prompt, type IPCONFIG /ALL.
To add the Mac address to your router’s access list:
- Open your web browser and enter the IP address of your wireless router. (For example, 192.168.1.1 or 172.16.0.0; To find the default IP address, see the documentation for your router.))
- Connect with your username and password, then search for a parameter indicating Mac address filter or a similar name.
- Add the MAC address noted for your PC to the access list and save your modifications.
On your PC, try to reconnect to the Wi-Fi network.
Check the basic operation of your PC
- Make sure Wi-Fi is activated.
- On a laptop, open the Windows mobility center by selecting the Start button, then selecting Configuration panel> Mobile PC >Windows Mobility Center.
- Consult the section Wireless network . If the Wi-Fi is activated, the button must indicate Wireless.
- Make sure the physical wi-fi switch on your laptop is activated. (Its activation is generally indicated by a light indicator.))
- Make sure your PC is not in plane mode.
- If possible, bring your PC closer to the router or the access point.
- If you do not see the name of the network at all, the router or the access point may not be configured to disseminate the network name. You will have to connect there manually.
- Open Manage wireless networks by selecting the button To start up , Then selecting Configuration panel. In the research area, type wireless, Then select Manage wireless networks.
- Select Add, Then Create a network profile manually.
- Enter information on the network.
- If you want Windows to connect you automatically when the network is within range, check the box Automatically launch this connection.
- Check the box Connect even if the network does not distribute its name, select Following,Then Close.
- The network is added to your network list and can be used when your PC is within reach. To connect to the network, proceed as follows:
- Open Connection to a network By selecting the network icon in the notification area.
- Select Name -free network, Then To log in. Then enter the network information. The network is added to your network list and can be used later when your PC is within reach.
Use the network problem solving utility
Let Windows try to help you solve the problem. Run the network problem solving utility to see if it can help diagnose and solve your problem.
Open the network problem solving utility, by right -clicking on the network icon in the notification area, then selecting Solve problems.
Execute network orders after using the network problem solving utility
The network problem solving utility (mentioned above) makes it possible to diagnose and solve certain current connection problems. After using it, try to run the network orders below, as the combination of these two operations may restore connection.
If your problem is not resolved after executing the network problem solving utility, try to:
- Reset the TCP/IP battery;
- Release the IP address;
- Repeat the IP address.
- Empty and reset the DNS customer resolution cache.
Here is how to execute these network orders in a command prompt window:

- Select the button To start up. Tap cmd In the search zone, right -click on cmd In the list, select Execute as administrator, Then select Yes.
- At the command prompt, run the following commands in the order indicated, then box activated to see if this solves your connection problem:
- Grab Netsh Winsock Reset And press Enter.
- Grab Netsh int ip reset And press Enter.
- Grab IPCONFIG /Release And press Enter.
- Grab IPCONFIG /RENEW And press Enter.
- Tap IPCONFIG /FLUSHDNS And press Enter.
Restart your modem and router.
This allows you to create a new connection to your Internet access provider (ISP). When you perform this operation, all people connected to your Wi-Fi network are temporarily disconnected.
The steps to follow to restart your modem and your router may vary. Here is the general follow -up:
- Disconnect the supply cable from the power source router.
- Disconnect the supply cable from the power source modem.
Check if the problem comes from the Modem or your Internet service provider
Make sure the problem does not come from your cable modem or your internet service provider. If necessary, contact your Internet service provider.
- Select the button To start up. Tap cmd In the search zone, right -click on cmd In the list, select Execute as administrator, Then select Yes.
- At the command prompt, type ipconfig.
The result must look like this:
If the ping request is successful and results similar to those described above are displayed, but you still cannot connect to the Internet from your PC, the problem may come from your modem or your service provider Internet.
Check your network card
If you always encounter connection to a network, it can be linked to your network card.
- Try to use the network problem problem solving utility to automatically detect and solve certain problems. This deactivated troubleshooting utility then reactivates the card and tries to carry out certain other current repair operations.
Open the network problems solving utility by selecting the button To start up
, Then in Selecting configuration panel. In the research area, type utility, Then select Problem resolution >Display all >Network card. - Update the network pilot An obsolete or non -compatible network card can cause connection problems. Check if an update of the driver is available.
- Open peripheral manager by selecting the button To start up, by selecting Configuration panel, System and security, then, under system, by selecting device Manager
 . If you are invited to enter an administrator password or confirm an operation, enter your password or confirm the operation.
 - In the peripheral manager, select Network cards, right -click on your card, then select Properties.
- Click on the tab Pilot, Then select Update the pilot.
- Select Automatically search for an updated software driver.
- Open peripheral manager by selecting the button To start up
- If you do not see the name of the network, log into your router and check that it is configured to broadcast the name of the network.
- Connect your PC to your router using an Ethernet cable.
- Open your web browser and enter the IP address of your wireless router. (For example, 192.168.1.1 or 172.16.0.0; To find the default IP address, see the documentation for your router.))
- Connect with your username and password, then check that an option entitled Activate the distribution of SSID, Wireless SSID broadcast or similar is activated. This parameter generally appears on a wireless parameter page.
- Check that your Wi-Fi network uses media access control (Mac) addresses for safety reasons. If this is the case, you must add the Mac address of your PC to the access list of your router before you can connect.
- Select the button To start up. Tap cmd in the search zone and right -click on cmd in the list. Select Execute as administrator, Then Yes.
- At the command prompt, type IPCONFIG /ALL.
- Open your web browser and enter the IP address of your wireless router. (For example, 192.168.1.1 or 172.16.0.0; To find the default IP address, see the documentation for your router.))
- Connect with your username and password, then search for a parameter indicating Mac address filter or a similar name.
- Add the MAC address noted for your PC to the access list and save your modifications.
If Windows does not find a new driver for your network card, go to the manufacturer’s manufacturer’s website to download the latest network card driver available. If your PC cannot connect to the Internet, you will have to download a driver on another PC, then save this driver on a USB memory disk to be able to install it on your PC. You will need the name of the manufacturer of the PC, as well as the name or number of the model.
Other steps to try with your router
Here are some items to check and try with your router if you are at home and have connection difficulties.
To add the Mac address to your router’s access list:
On your PC, try to reconnect to the Wi-Fi network.
Solve internet connection problems on Mac

If you cannot connect your Mac to the Internet, the problem may be linked to cables, devices, network settings or your Internet access provider (ISP).
Consult Wi-Fi recommendations or use wireless diagnostics

If problems related to Wi-Fi are detected on your Mac, you can consult these problems and solutions suggested. Click on the Wi-Fi status icon in the menu bar, then select Wi-Fi recommendations. Wi-Fi recommendations are not available for business networks or connection sharing.
You can use wireless diagnostics to solve problems related to a network that you have already configured.
Check a Wi-Fi connection
If you usually connect to the Internet using a Wi-Fi network, check that you are well connected.
If you are connected to the Wi-Fi network, but you cannot connect to the Internet, it is possible that the problem comes from your Internet connection. If you configure the Wi-Fi network using an Airport device (such as an Airport Extreme access terminal), you can obtain information on the device and its Internet connection using Airport utility. To get more help on Airport utility, choose Help> Airport Utility Help.
Check the condition of your network connections
You can check your settings and the state of each network service, such as Wi-Fi, Ethernet and Bluetooth, in network settings.
On your Mac, choose the Apple menu

> System settings, then click network in the sidebar. You may have to scroll the page down.
The network service you use must have a green indicator and the word “connected”.
To display more information on your network service, click on it to select it.
Check your external cables and devices
Make sure all the cables are properly connected. If you use an external modem, make sure that one cable is firmly connected from this device to the computer and that the other connects the modem to a power outlet.
Check that all external peripherals, such as modems, concentrators and routers, are connected, are under voltage and have started completely. Try to reset these devices by disconnecting them for a few minutes, then reconnecting them.
Check the lights of the device to determine if it records a connection to the network and your computer. If a light does not light up, see the documentation provided with your device or contact your FAI.
Check your internet service
If all the above settings are properly configured and you still cannot connect to the Internet, contact your FAI. It is possible that its service is temporarily disturbed.